2026 Guide to Water Softener Installation, Repair, and Maintenance
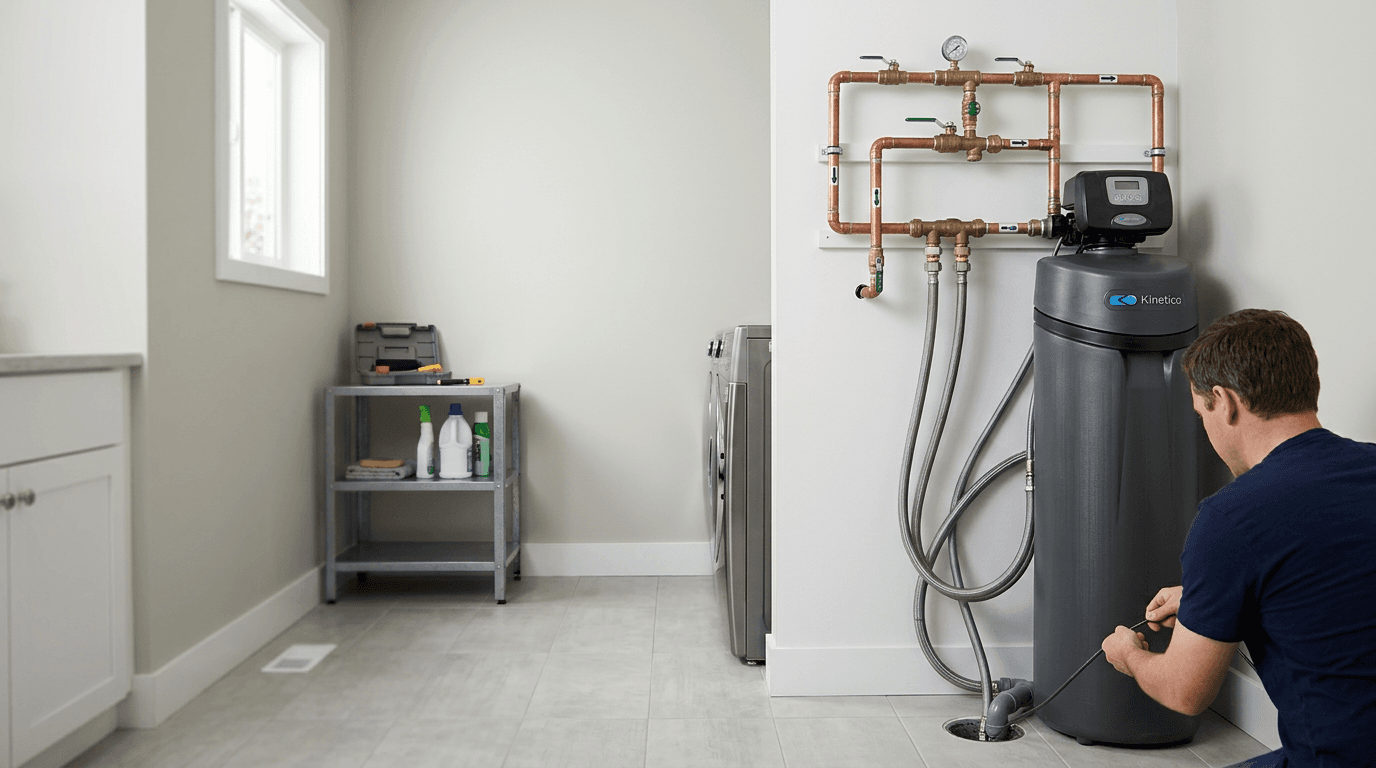
Water from the North Saskatchewan River arrives at homes across Edmonton, Beaumont, Leduc, and Sherwood Park carrying roughly 165 milligrams per litre, or 9.6 grains per gallon, of dissolved calcium and magnesium. It is hard water that steadily builds scale inside pipes, ruins water heater efficiency, and leaves fixtures permanently crusted. Attempting a water softener installation without understanding the precise hydraulics of your home's plumbing often results in restrictive pressure drops, overflowing brine tanks, or a system that exhausts its resin bed years before its time. This guide covers the mechanics of sizing, cutting pipe, routing drain lines, and conducting long-term upkeep. When you understand how the equipment physically manages mineral loads, you can keep it running efficiently and handle the inevitable part replacements without flooding the mechanical room.
Quick Summary
A properly configured hard water softener relies on precise ion exchange to strip calcium and magnesium from the household supply. Correct sizing, exact plumbing modifications with a dedicated bypass, strictly routed drain lines, and accurate valve programming dictate the system's longevity and flow rate.
- Sizing requires calculating daily grain capacity based on the 9.6 gpg local hardness average and household water volume.
- Plumbing demands a structural bypass to isolate the unit during servicing without shutting down the entire home's water supply.
- Drain lines must feature a physical air gap to prevent municipal wastewater cross-contamination.
- Routine upkeep involves monitoring the brine tank for salt bridging and clearing the venturi injector to maintain brine draw.
Table of Contents
- 1. Preparing for water softener installation
- 2. Assembling the bypass and cutting the plumbing
- 3. Connecting water softener parts and drain lines
- 4. Programming the control valve for local hardness
- 5. Establishing a water softener maintenance routine
- Common Pitfalls & Troubleshooting
- FAQ
- Recommended Reads
1. Preparing for water softener installation
Every successful installation begins with accurate mathematical sizing, not guesswork. A hard water softener operates on the principle of cation exchange: polystyrene resin beads inside the main tank are coated with sodium ions. When hard water flows through, calcium and magnesium ions - which carry a stronger positive charge - knock the sodium off the beads and take its place. Once the resin is fully saturated with calcium, the system must regenerate using a concentrated saltwater brine to force the calcium down the drain.
If the system is undersized, it regenerates too frequently. This wastes water, consumes excessive salt, and grinds down the mechanical gearing inside the control head. If it is oversized, the resin bed sits stagnant, inviting bacterial growth and channeling. To find the correct size, multiply your household's daily water usage by the local hardness. An average family of four uses 300 gallons a day. At the local average of 9.6 grains per gallon, the home requires 2,880 grains of softening capacity daily. Because regeneration typically happens every seven days, the system needs at least 20,160 grains of capacity just to keep up. Checking an Edmonton water hardness and quality guide helps confirm the exact mineral load entering your specific neighbourhood.
Placement is the next rigid constraint. The equipment must sit upstream of the water heater to protect the thermal elements from scale, but downstream of outdoor hose bibs. You do not want to waste softened water and salt capacity on the lawn. The location requires a nearby standard 120-volt electrical outlet and a floor drain or standpipe. Never run extension cords across the mechanical room to power the unit, as the voltage drop can reset the digital timer during heavy load cycles.
2. Assembling the bypass and cutting the plumbing
Pipes must be completely drained before cutting. First, shut off the main water supply. The most critical plumbing component of the entire setup is the bypass valve. Every water softener requires a mechanism to divert water around the tank during maintenance, media replacement, or a catastrophic tank failure. While many modern units ship with a factory single-yoke bypass, constructing a three-valve plumbing manifold out of copper or PEX provides a rigid, high-flow structure. This manifold will not restrict water pressure to the rest of the house.
When cutting into the main cold water line, leave enough exposed pipe to secure your fittings. If you are soldering copper, remove the control head from the tank entirely before bringing a torch anywhere near the plastic housing. A melted distributor ring will ruin the system before it ever runs. Furthermore, cutting a copper water main severs the home's electrical ground path. You must install a grounding jumper cable across the cut section to maintain electrical safety compliance.
If you are using PEX piping, expansion fittings (PEX-A) offer a superior flow rate. Crimp rings (PEX-B) insert a narrower fitting inside the pipe. This slightly chokes the volume. Pay absolute attention to the directional flow arrows. They sit stamped onto the softener's inlet and outlet ports. Reversing the connections forces water down the center distributor tube instead of over the resin bed. This violently blows the tiny ion-exchange beads directly into your home's plumbing, destroying faucet aerators, washing machine inlet screens, and toilet fill valves. For those planning a complete water softener installation in Edmonton, correcting reversed plumbing is the most common reason an amateur install requires professional rescue.
3. Connecting water softener parts and drain lines
The internal mechanics rely on a central distributor tube, which runs from the control head down to the bottom of the resin tank. This tube terminates in a slotted basket that prevents the resin beads from escaping into the plumbing. When connecting the water softener parts, the distributor tube must sit perfectly flush inside the control valve O-ring. If the tube is cut too short, hard water slips past the seal, entirely bypassing the resin bed. If it is cut too long, the control head will not seat properly, leading to a cracked housing under pressure.

Routing the wastewater safely is where the most dangerous errors occur. A standard softening system utilizes two separate drain lines. The primary control valve drain handles the pressurized, heavy flow of the backwash and regeneration cycles. The secondary brine tank overflow is a gravity-fed safety line that prevents the basement from flooding if the primary valve jams open.
Practical rule: Never tie a water softener drain line directly into a household sewer pipe without a one-inch physical air gap.
If the municipal sewer backs up, a direct, sealed connection will siphon raw sewage straight into your drinking water supply. The air gap breaks that physical connection. Route the primary drain line to a standpipe or laundry sink, securing it firmly so the backwash pressure does not whip the hose out of the drain. The gravity overflow line must route downwards continuously to a floor drain. Because the overflow relies purely on gravity, pushing it uphill over a ceiling joist renders it completely useless.
4. Programming the control valve for local hardness
Modern systems employ metered control valves that count every gallon passing through an internal turbine. This on-demand regeneration is vastly superior to older time-clock models that flush the system based purely on the calendar, regardless of actual water usage.
Programming the control head requires entering the tested water hardness, the tank's total grain capacity, and calculating the reserve. The reserve capacity ensures you do not run out of soft water on the day the system intends to regenerate. If your family uses 300 gallons daily, the valve must hold back enough resin capacity to cover that volume before triggering a cycle at 2:00 AM. Setting the hardness artificially high in an attempt to get "softer" water does nothing but waste salt and prematurely exhaust the resin.
The programming phase is also when you establish the day override. This setting forces a regeneration cycle every 14 days, even if the metered water volume has not been reached. In smaller households, water can sit in the resin tank for weeks. Without a day override, the stagnant water allows bacteria to flourish and the resin bed to compact, creating channels where water flows straight through without contacting the beads.
If you are incorporating a point-of-use drinking filter, such as the Triton Pure or Triton Pure Tankless packages, calibrate the primary softener first. Supplying soft, mineral-free water to a secondary membrane significantly extends the life of those secondary filters. Properly sequenced reverse osmosis system installations in Edmonton rely entirely on the main water softener to strip out the heavy calcium before it reaches the delicate thin-film composite under the kitchen sink. Adjusting the softener's regeneration schedule ensures the primary tank is always ready to feed the secondary filters.
5. Establishing a water softener maintenance routine
The mechanical integrity of the equipment depends on a strict water softener maintenance schedule. Neglect is the primary cause of premature failure. The most frequent operational task is managing the brine tank. Using high-purity evaporated salt pellets rather than cheap rock salt prevents dirt, sand, and clay from accumulating at the bottom of the tank. Those impurities will eventually get sucked into the control head and block the microscopic injector nozzles.
Once a year, let the salt level drop entirely to the bottom. Scoop out any hardened sludge, scrub the interior of the brine tank with a mild bleach solution, and flush it cleanly. This prevents the buildup of sediment that chokes the brine draw.
The resin bed itself requires chemical upkeep. While the softener removes calcium and magnesium, municipal water supplies also carry trace amounts of iron and heavy doses of chlorine. Chlorine aggressively attacks the divinylbenzene binder that holds the resin beads together. Over time, the beads turn into a mushy gel that restricts water pressure. Standard resin degrades much faster than a more densely cross-linked alternative when exposed to heavily chlorinated environments. Adding a dedicated resin cleaner to the brine well every six months helps strip away iron fouling and protects the molecular structure of the beads. Looking at the long-term water softener requirements in Leduc, homes that commit to annual chemical cleanings routinely see their resin beds outlast the manufacturer's predicted lifespan by several years.
Common Pitfalls & Troubleshooting
When the water suddenly feels hard, or the pressure drops, the system leaves clear diagnostic clues. Effective water softener service requires identifying the specific mechanical failure rather than just adding more salt and hoping for the best.
The Salt Bridge
The tank appears completely full of salt, but the water beneath it is depleted. High humidity causes the salt pellets at the top to fuse into a solid concrete-like dome. The system continues to run its regeneration cycles, but because the water below cannot touch the salt above, no brine is created. The resin is never cleaned, and the house gets hard water.
- The Fix: Push a wooden broom handle down into the salt to break the crust. To prevent this, never fill the brine tank more than halfway during the humid summer months.
Clogged Venturi Injector
The system fails to draw brine from the tank during the regeneration cycle. The brine tank slowly fills with water over several weeks until it reaches the overflow line. This occurs because the tiny venturi nozzle inside the control head, which creates the vacuum necessary to siphon the brine, is blocked by sediment or iron.
- The Fix: Isolate the unit using your bypass valves and relieve the internal water pressure. Open the injector housing on the control head and remove the venturi nozzle. Clean the microscopic hole with a wooden toothpick. Never use a needle or metal wire, as altering the precisely engineered shape of the hole destroys its ability to create a vacuum.
Resin Bed Attrition
The water pressure across the entire house drops significantly, especially when multiple fixtures are running simultaneously. If the system is over ten years old, or has been exposed to high chlorine without a pre-filter, the resin beads have collapsed into a thick, restrictive sludge. The water simply cannot push through the tank.
- The Fix: The resin bed must be completely replaced. This involves disconnecting the tank, dumping the old media, and repacking it with fresh gravel and new, densely cross-linked resin. Depending on the labour involved, examining the overall water softener cost in Edmonton often reveals that replacing a deeply degraded twelve-year-old tank is more economical than paying for a complex media swap.
Scored Piston Seals
Water continuously trickles down the backwash drain line, even when the system is in its normal service mode and not actively regenerating. The internal spacer stack and the rubber seals that isolate the different water channels inside the control head have worn out, allowing line pressure to bleed directly into the drain port.
- The Fix: Rebuilding the valve core requires a specific replacement seal and spacer kit tailored to that exact model. Disassemble the drive motor assembly, pull the main piston, and lubricate the new O-rings exclusively with food-grade silicone grease before reassembly. Using petroleum jelly will swell the rubber and permanently jam the new piston.
FAQ
How long does the ion-exchange resin last before needing replacement?
In a standard residential environment treating moderately hard water, standard cross-linked resin lasts between 10 and 12 years. If the municipal supply has heavy chlorine concentrations, the resin will break down into a restrictive gel much faster, sometimes failing in under eight years. Using a more densely cross-linked resin or installing a whole-home carbon pre-filter extends that lifespan to over 15 years.
What type of salt is best for the system?
Evaporated salt pellets are the highest purity option, consisting of almost entirely pure sodium chloride. They leave virtually no residue in the brine tank. Solar salt crystals are slightly less pure but still acceptable. You should entirely avoid rock salt; it contains high levels of dirt and insoluble clay that will eventually clog the venturi injector and require a difficult water softener repair to clear the control head.
Will softening the water affect my drinking water supply?
Yes, the cation exchange process trades calcium and magnesium for trace amounts of sodium. For every grain of hardness removed, roughly 8 milligrams of sodium are added to a litre of water. At a local hardness of 9.6 grains, this adds a small but measurable amount of dietary sodium. This is why a conventional salt-based system does not suit homes on severe sodium-restricted medical diets unless paired with a reverse osmosis tap. The Triton Pure or Triton Pure Tankless packages address this directly; the reverse osmosis membrane beneath the sink effectively strips out the added sodium, providing purified drinking water while the rest of the house enjoys scale-free plumbing.
How often should the system naturally regenerate?
A properly sized metered system for an average family of four will typically regenerate once every 7 to 10 days. If the unit is flushing every two or three days, it is severely undersized for the household's water consumption, which will burn out the control valve motor prematurely. For larger estates, such as those evaluating water softener demands in Sherwood Park, the sizing must account for multiple high-flow showers running simultaneously to prevent exhausting the capacity mid-week.
Does a water softener require a dedicated electrical circuit?
No, it does not draw enough amperage to require a dedicated breaker. The control head relies on a small transformer that only draws significant power when the tiny electric motor turns the piston during regeneration. However, it must be plugged into a reliable, unswitched receptacle. Sharing an outlet with a heavy-draw appliance like a chest freezer or sump pump can cause voltage drops that reset the digital timer.