The 2026 Guide to Water Softener Installation for Hard Water Regions
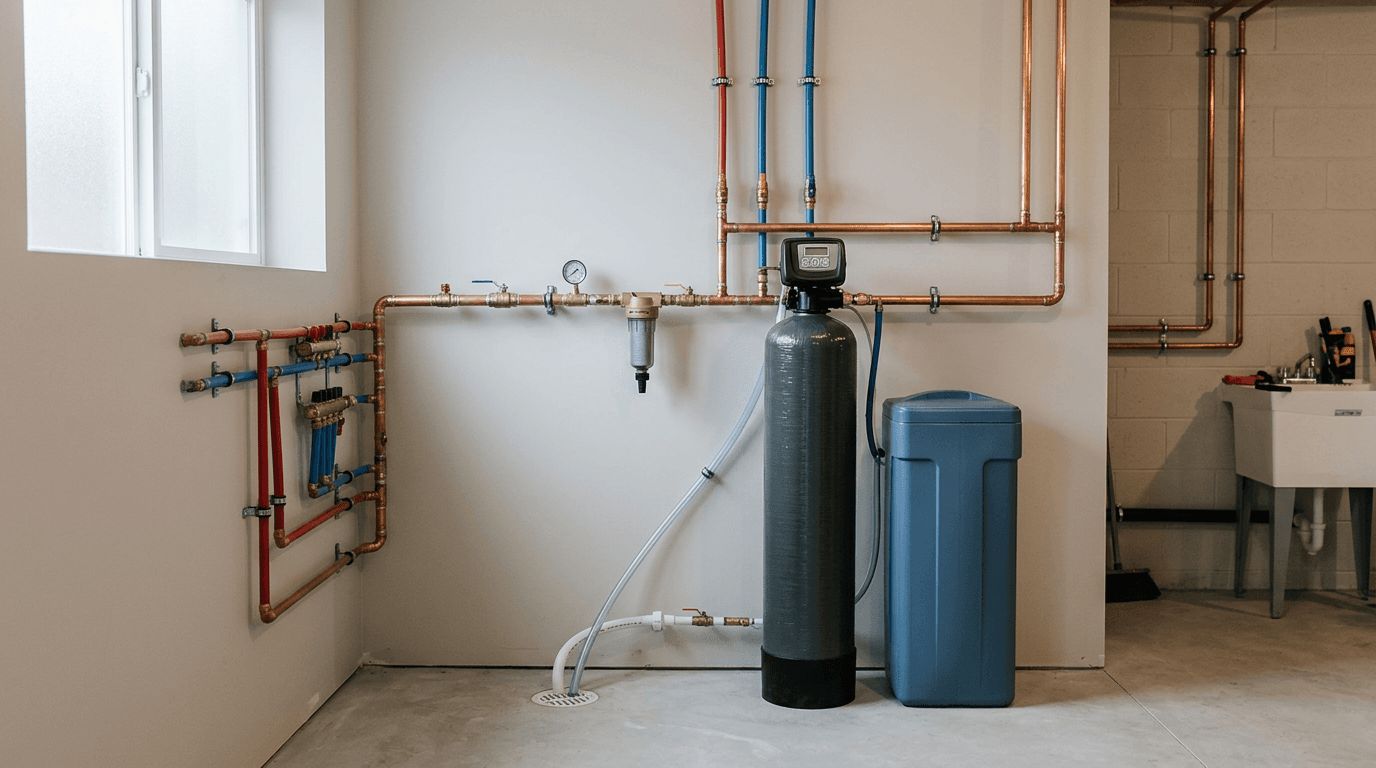
Most homeowners assume that dealing with hard water is just a matter of buying a tank and connecting two pipes together. In reality, the physical plumbing is only a fraction of a successful water softener installation. If you fail to map out the exact drainage routing, mismatch the resin bed capacity to your specific municipal water chemistry, or misprogram the control valve's regeneration cycle, even the most expensive hardware will fail to protect your home's appliances. The difference between a system that lasts fifteen years and one that fails in three comes down to the specific calculations and cuts made before the water is ever turned back on.
Quick Summary
A water softener installation is the process of integrating an ion-exchange treatment system into a home's main plumbing line to permanently remove calcium and magnesium minerals. Doing this correctly requires calculating local water hardness, routing a safe air-gapped drain line, and separating outdoor irrigation lines from the treated water supply.
- Calculate system capacity based on your peak flow rate and specific regional hardness, not just the square footage of your home.
- Always implement a physical air gap in the drainage line to prevent municipal sewer backups from contaminating your drinking water.
- Route outdoor hose bibs away from the softener to avoid wasting resin capacity on lawn care.
- Combine softening and reverse osmosis in sequence, ensuring the softener protects the membrane from calcium fouling.
- Verify that the bypass valve is installed in the correct flow direction to prevent resin beads from washing out into your home's plumbing fixtures.
Table of Contents
- 1. Sizing the unit before a water softener installation
- 2. Mapping out the drainage and air gaps
- 3. Cutting into the main plumbing line
- 4. Integrating whole-home and point-of-use filtration
- Common Pitfalls & Troubleshooting
- FAQ
- Recommended Reads
1. Sizing the unit before a water softener installation
Installing a system without measuring your exact water chemistry guarantees premature failure. A water softener works through ion exchange: water passes through millions of negatively charged resin beads that attract positively charged calcium and magnesium ions. Once those beads are completely coated in minerals, the system must regenerate by flushing them with a concentrated saltwater brine. The physical volume of resin in the tank dictates how many days the system can run before it needs to regenerate.
Why municipal averages ruin resin beds
Many property owners buy an off-the-shelf system sized for a "standard family of four" without testing the water first. Hardness is measured in grains per gallon (GPG). If you review a local Edmonton water hardness and quality guide, you will see specific metrics for surface water sources that differ entirely from surrounding well-water zones. If your local water has a hardness of 15 GPG, and you use 300 gallons a day, your system must process 4,500 grains of hardness daily.
For context, a homeowner executing a water softener winnipeg setup will need to program their control valve for a different exchange capacity than someone in Alberta, because the surface water mineral profile behaves differently. Similarly, a water softener regina installation must account for exceptionally high mineral counts that will exhaust a standard, undersized resin bed in half the normal time. When configuring a system for properties needing a water softener in Beaumont, AB, you must manually test the water coming out of the main valve rather than relying on a municipal average from a treatment plant miles away. Under-sizing the tank means the system regenerates too frequently, wasting hundreds of gallons of water and accelerating wear on the moving parts inside the control valve.
2. Mapping out the drainage and air gaps
The most destructive mistakes during an installation happen at the drain line. During the regeneration cycle, the control valve executes a backwash phase, pushing water rapidly upward through the resin bed to lift compacted beads and flush out trapped sediment. Following this, it draws heavy saltwater from the brine tank and then rinses it away. All of this wastewater - often 30 to 50 gallons per cycle - must be discharged safely into your home's wastewater plumbing.
Where cross-contamination happens
If you look at any standard water softener installation diagram, you will notice a distinct physical gap between the flexible drain hose coming off the control valve and the rigid PVC pipe of the home's sewer standpipe. This 1.5-inch void is called an air gap.
Do not hard-pipe the softener's drain line directly into the sewer line. If the municipal sewer system backs up, a hard-piped connection allows raw sewage to siphon backward directly into your water softener's resin bed, permanently contaminating your home's entire potable water supply. The air gap breaks that vacuum. Additionally, the drain line must not be elevated too high above the control valve; most residential valves cannot push wastewater higher than eight vertical feet without losing the flow velocity required to properly lift the resin bed. When planning the drainage route for a water softener in Leduc, AB, verify that the floor drain or standpipe is within ten horizontal feet of the system to prevent back-pressure from stalling the backwash cycle.
3. Cutting into the main plumbing line
Executing a proper water softener system installation requires isolating the main water line where it enters the house, immediately after the primary shut-off valve and the water meter. The physical connections require cutting into copper, PEX, or CPVC piping and installing a bypass valve block.

The hazard of reversing the bypass flow
The bypass valve allows you to physically divert water around the softener when it requires maintenance, keeping the rest of the house pressurized. When splicing this block into your main line, direction matters. The raw municipal water must enter the "inlet" port, flow down through the resin, and exit through a central distributor tube out the "outlet" port.
Plumbing the system backward is a catastrophic error. If municipal water is forced into the outlet port, it travels down the central tube and blasts upward into the resin at high pressure, blowing the internal upper basket off its mount. This flushes millions of tiny plastic resin beads directly into your home's plumbing network, where they will permanently clog shower valves, faucet aerators, and the intake screens of your washing machine.
Practical rule: Always route your outdoor hose bibs off the main plumbing line before the water reaches the softener bypass, so you avoid wasting resin capacity and salt on lawn irrigation.
When working on older homes where the main stack is severely corroded, cutting the pipe can cause downstream leaks. If your main line is completely concealed behind finished drywall or consists of brittle, degraded copper, hiring a licensed water softener installation plumber is a necessary precaution to avoid accidental flooding. For homes getting a water softener in Sherwood Park, AB, you must also ensure the installation meets local building codes regarding pipe support and grounding wire continuity if you cut a section out of a bonded copper plumbing system.
4. Integrating whole-home and point-of-use filtration
A water softener removes hardness, but it does not filter out chlorine, chloramines, or industrial agricultural runoff. To achieve high-quality drinking water, many homeowners install reverse osmosis (RO) systems alongside their softening equipment. The physical layout of these two systems is critical to how well both function.
Protecting reverse osmosis membranes from scale
When combining these treatments, sequence is everything. The water softener must sit first in line. Reverse osmosis works by forcing water through a semi-permeable membrane with microscopic pores. If raw, hard water hits that membrane, calcium rapidly scales the delicate surface, blinding the pores and destroying the filter within a few months. By routing the water through the softener first, you remove the calcium, allowing the RO membrane to operate efficiently for years. The RO system then steps in to remove the trace amounts of sodium the softener added during the ion exchange process.
Many households opt for structured combination setups, like the Triton Pure or Triton Pure Tankless packages, which integrate robust whole-home softening with targeted kitchen purification. When arranging a reverse osmosis system installation in Edmonton, pay attention to the water pressure. Softeners inherently create a slight pressure drop as water forces its way through the dense resin bed. Tankless RO systems rely entirely on strong line pressure to push water through the membrane on demand. Ensure your incoming municipal pressure is high enough to handle the sequential drop of both systems without leaving your kitchen tap sputtering.
Common Pitfalls & Troubleshooting
When a newly installed system behaves erratically, the hardware is rarely defective; the fault almost always lies in the setup environment or the physical plumbing execution. These failures present identical symptoms to the homeowner but require completely different interventions.
1. The system cycles constantly, but the water remains hard.
- Symptom: You hear the control valve motor running at night, but scale continues to build on your glass shower doors and soap barely lathers.
- Diagnosis: This is the most common operational failure and is caused by a salt bridge. High humidity or overfilling the brine tank causes the salt pellets at the top to fuse into a solid concrete-like dome. The water underneath hollows out the loose salt, meaning the tank appears full, but the water never actually touches the salt to create brine. Without brine, the resin cannot regenerate.
- Fix: Take a broom handle and firmly tap the surface of the salt. If it feels solid and does not yield, strike it until the bridge collapses. Moving forward, only fill the tank halfway to prevent moisture from cementing the upper layers.
2. Water throughout the house tastes noticeably salty.
- Symptom: The morning after a regeneration cycle, the first glass of water drawn from the kitchen sink is highly saline.
- Diagnosis: The system failed to complete its final fast rinse cycle, leaving concentrated brine inside the resin tank. This usually happens because the drain line is kinked, severely restricting the outward flow of water, or because the main line water pressure dropped dramatically overnight while the system was attempting to rinse.
- Fix: Inspect the entire length of the flexible drain tubing. If it is pinched behind a water heater or frozen where it routes through an unheated garage, clear the obstruction. Manually trigger a secondary fast rinse cycle at the control valve head to flush the lines.
3. Sudden, severe drop in whole-house water pressure.
- Symptom: A few days after installation, shower flow drops to a trickle and the washing machine takes hours to fill.
- Diagnosis: If you evaluate a water softener installation in Edmonton, pressure issues often stem from an overly aggressive initial backwash or backward plumbing that ruptured the upper basket, sending resin into the pipes. Alternatively, if the system was installed on heavily chlorinated municipal water without a pre-filter, chlorine can degrade the structural integrity of the resin beads, turning them into a dense, restrictive mush.
- Fix: Immediately engage the physical bypass valve to route water around the softener. If pressure returns to normal, the blockage is inside the tank. You will need to replace the damaged resin bed entirely and flush every aerator and cartridge valve in the home to clear escaped debris.
4. A continuous slow leak at the control valve base.
- Symptom: Water continuously weeps from the collar where the electronic head meets the fibreglass resin tank.
- Diagnosis: During assembly, the main O-ring that seals the control valve to the tank neck was either pinched, installed dry, or sliced by a rough edge on the central distributor tube.
- Fix: Shut off the water, depressurize the system by opening a faucet, and unthread the control valve. Inspect the O-ring for physical tears. Coat a new O-ring thoroughly with food-grade silicone grease (never use petroleum jelly, which degrades rubber) and re-seat the head firmly.
FAQ
Do I need a floor drain to install a water softener? You do not strictly need a floor drain, but you must have a plumbing drainage point nearby. A laundry sink, a dedicated standpipe, or a sump pit (if local codes permit discharging brine into it) are all viable alternatives. The critical requirement is that the drain point can handle a sudden, sustained flow of several gallons per minute without overflowing.
Can the discharge water go into my septic tank? Yes, standard residential water softeners discharge a volume and concentration of brine that a healthy, properly sized septic system can easily dilute and process. The regeneration wastewater will not kill the bacteria in the septic tank, provided the system is sized correctly and not regenerating needlessly every single day.
How far can the brine tank be placed from the main resin tank? While keeping them side-by-side is ideal, the brine tank can typically be placed up to 10 to 15 feet away from the resin tank, provided you maintain a continuous, unkinked run of 3/8-inch brine tubing. Extending it further than this risks losing the vacuum pressure required for the venturi valve to reliably pull the heavy saltwater up into the control head.
What is the difference between cabinet and two-tank models during setup? A cabinet model houses both the resin tank and the salt storage in one unified plastic shell, saving floor space but making it significantly heavier and more difficult to manoeuvre into tight plumbing alcoves. A two-tank system separates the resin cylinder from the brine drum, allowing for easier physical placement, simpler maintenance, and the ability to replace individual components rather than the entire appliance.
Will the installation affect my outdoor hose bibs? It will only affect them if you fail to separate the plumbing lines. A proper installation isolates the irrigation pipes before the bypass valve, ensuring outdoor taps draw hard, untreated municipal water. Watering lawns with softened water introduces unnecessary sodium to your soil and forces your system to regenerate constantly, wasting salt on landscaping.