The Complete Guide to Home Water Filter Replacement and Component Servicing
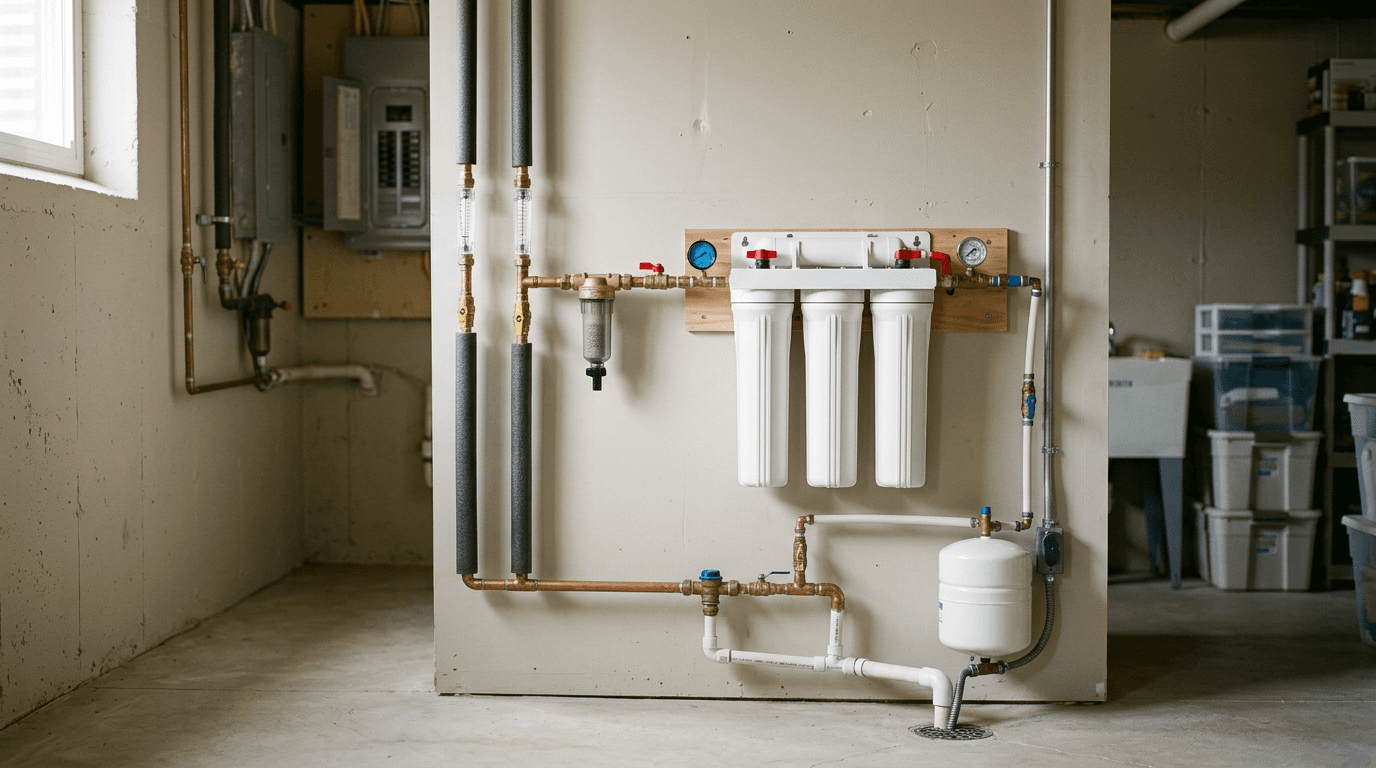
You walk into the kitchen, push a glass against the fridge dispenser, and notice the water pressure has dropped to a frustrating trickle. Downstairs, the brine tank looks full, but the shower glass is suddenly scaling up with white calcium spots again. These are the moments that signal a delayed water filter replacement or a failing mechanical component in your home's treatment system. In regions with heavy municipal chlorination and severe water hardness - like the 9.6 grains per gallon frequently seen in Edmonton, Beaumont, Leduc, and Sherwood Park - treatment equipment works constantly to protect your plumbing. Letting maintenance slip means the media degrades, water pressure plummets, and raw hard water begins damaging your appliances. This guide breaks down exactly how to service your residential equipment, from depressurizing a filtration manifold to inspecting control valves, so you can restore flow rates safely.
Quick Summary
Home water treatment maintenance requires a systematic approach to swapping exhausted media and cleaning control mechanisms before mineral scaling or biological growth ruins the system. Routine component servicing guarantees that filtration stages function sequentially, preserving membrane life and maintaining optimal water pressure throughout the property.
- Shut off the main supply and depressurize the lines before opening any pressurized housing.
- Sanitize filter sumps with unscented bleach during every media change to prevent bacterial colonization.
- Clean the venturi valve and brine line when servicing softener components to maintain brine suction.
- Map out a maintenance schedule based on local municipal water hardness and chlorine levels.
Table of Contents
- 1. Water Filter Replacement and Depressurization
- 2. Reverse Osmosis Filter Installation
- 3. Pre-Treatment Filter Maintenance
- 4. Mechanical Component Inspections
- 5. Brine Tank Maintenance
- Common Pitfalls & Troubleshooting
- FAQ
- Recommended Reads
1. Water Filter Replacement and Depressurization

Why Skipping the Bleed Valve Causes Catastrophic Leaks
Opening a pressurized housing without bleeding the line first will blow the O-ring out of its seat and flood your utility room. Before attempting any water filter replacement on the sediment cartridge that protects your whole-home system, you must physically isolate the unit from municipal pressure. Turn the inlet and outlet bypass valves to the perpendicular position. Then, open a cold water faucet downstream - usually a laundry sink or bathtub - to bleed off the remaining line pressure. You will hear a sharp hiss, and the water flow will stop completely. Only then should you apply the plastic filter wrench to the housing sump.
The sediment pre-filter catches physical debris like silt, sand, and pipe scale. It stops this grit before it can reach the sensitive resin beads in a softener or the microscopic pores of an RO membrane. A common mistake here is forgetting to lubricate the housing O-ring after changing the cartridge. A dry O-ring will crimp. This happens when you tighten the sump. It creates a microscopic gap that sprays a fine mist of water once the system is re-pressurized.
Practical rule: Always coat the rubber O-ring with a food-grade silicone lubricant (never petroleum jelly, which degrades rubber) before threading the housing back onto the manifold.
When inspecting combined setups like the Triton Pure packages, check the pre-filter every three to six months. If the spun polypropylene cartridge has turned dark brown or feels slimy to the touch, municipal line flushing or local construction has likely sent a surge of particulate into your plumbing, necessitating an immediate swap to protect downstream equipment.
2. Reverse Osmosis Filter Installation
How Bacterial Biofilms Exploit Unsanitized Housings
Under-sink systems rely on water pressure pushing against a semi-permeable membrane. When the pre-filters clog with debris, the pressure drops, and the membrane cannot reject dissolved contaminants efficiently. A proper reverse osmosis filter installation requires replacing the carbon blocks, the sediment cartridge, and eventually, the membrane itself, in a specific sanitary sequence.
First, close the feed water valve under the sink and the valve on top of the storage tank. Open the dedicated faucet at the sink to relieve manifold pressure. When removing the carbon pre-filters, keep a towel handy; the housings will still be full of water. Homeowners frequently make the error of ignoring the sanitation phase during this step. If you simply drop new filters into grimy housings, bacterial biofilms will immediately colonize the fresh carbon blocks.
Wash the empty sumps with warm soapy water, rinse them thoroughly, and add one teaspoon of unscented household bleach to the first housing. Reattach the empty housings and turn on the feed water to push the chlorinated water through the manifold (without the membrane installed) to sanitize the lines. Flush this out entirely before installing the new cartridges. For comprehensive setups like the Triton Pure Tankless systems, you avoid the storage tank sanitation entirely, but the filter replacement protocol remains strict to prevent premature membrane fouling. We frequently advise Reverse Osmosis System Installation Edmonton clients to swap carbon blocks annually, strictly to prevent municipal chlorine from reaching and oxidising the thin-film composite membrane.
3. Pre-Treatment Filter Maintenance
Where Cross-Threading Destroys the Manifold Head
Standard ion-exchange tanks do not contain replaceable fabric cartridges, but they are almost always paired with a spin-down sediment trap or a whole-home carbon block. When people talk about a water softener filter change, they are usually referring to this vital pre-treatment stage.
If your home draws water from a well or an aging municipal grid, you might have a 50-micron pleated filter mounted directly before the softener inlet valve. To change water softener filter safely, you must bypass the entire softening loop. Rotate the main bypass valve clockwise. Once bypassed, use the red pressure relief button on top of the filter head (if equipped) to let the trapped air out before applying your wrench.
The primary failure mode at this stage is cross-threading the housing. Because these sumps are heavy with water and often located in cramped, dimly lit utility rooms, it is exceptionally easy to misalign the threads. Tightening a cross-threaded housing will permanently strip the plastic, requiring a complete replacement of the manifold head. Hand-tighten the housing until it stops, and use the filter wrench only for the final quarter-turn. If you feel severe resistance immediately, back it off and realign. Homeowners in areas with high particulate counts - often seen when inspecting a Water Softener Sherwood Park, AB installation after spring runoff - might need to swap this pre-filter quarterly rather than bi-annually.
4. Mechanical Component Inspections
Why the Venturi Valve Dictates Regeneration Success
A softening system relies on a highly calibrated sequence of pressure changes to draw brine, rinse the resin bed, and repack the media. When the system stops removing calcium, the issue is rarely the resin itself; it is almost always one of the mechanical water softener parts inside the control valve assembly.
The most critical internal component is the venturi valve, often called the injector. This tiny plastic nozzle creates the specific suction required to pull salty water from the brine tank into the resin tank during the regeneration cycle. Because it deals directly with raw, unsoftened water and salt debris, the venturi is highly prone to microscopic clogs. A clogged injector means no suction, which means the resin never recharges, leaving your house with hard water.
To clean it, bypass the unit, depressurize it by initiating a manual regeneration cycle, and unscrew the injector cap on the side of the control valve. Pull out the screen and the injector nozzle. Soak them in warm water or a mild descaler, and use a soft wooden toothpick to clear the microscopic hole. Never use a metal needle, as scratching the plastic interior will permanently ruin the fluid dynamics. Routine inspections of these components save you from costly service calls. Evaluating the float assembly and brine line connections is a standard step during a Water Softener Leduc, AB maintenance visit, as hard water scaling can quickly lock the safety float in the 'open' position.
5. Brine Tank Maintenance
The Hidden Cost of Overfilling the Brine Tank
The separate brine tank is the engine room of the ion-exchange process. Even with a perfectly functioning digital control head, poor salt management will cause the entire system to fail. Setting up a consistent water softener salt delivery schedule prevents the tank from running dry, but exactly how you load that salt dictates whether the system can actually use it.
The most frequent mistake homeowners make is completely filling the brine tank to the brim. Dumping six bags of salt in at once might seem like a practical time-saver, but the sheer weight compresses the salt at the bottom. In humid environments, this leads to "salt bridging" - a hard crust that forms across the width of the tank, leaving a hollow void of water underneath. The system's sensors register a full tank, but the water cannot touch the salt to create the required brine solution.
Keep the salt level just a few inches above the water line, usually hovering around the half-full mark. If you suspect a bridge has formed, take a wooden broom handle and carefully poke straight down into the salt bed. If it hits a hard barrier and then breaks through into empty space, you have found a bridge. Break it up gently, being careful not to puncture the plastic brine grid at the bottom. Consistent checks, especially for residents using a Water Softener Beaumont, AB system where hard water demands frequent regeneration, ensure the brine concentration remains high enough to fully strip calcium from the resin beads.
Common Pitfalls & Troubleshooting
Water treatment systems exhibit overlapping symptoms when they fail. Diagnosing the exact root cause prevents you from throwing expensive replacement parts at a simple mechanical blockage.
1. The Clogged Venturi Valve (Most Often the Real Cause)
- Symptom: The brine tank is full of water that never goes down after a cycle, and your home suddenly has hard water scaling on shower doors and faucets.
- Fix: The system is failing to draw suction during the brine cycle. Bypass the equipment, unscrew the venturi cover on the control head, and carefully clear the injector nozzle with a wooden toothpick. This single blockage accounts for the vast majority of "failed" systems.
2. The Reverse Osmosis Air Lock
- Symptom: You just changed the cartridges, but the water pressure at the dedicated sink faucet is a weak trickle, even after leaving the storage tank to fill for several hours.
- Fix: The system is air-locked, or the internal bladder in the storage tank has lost its charge. Turn off the tank valve and feed water, then disconnect the tube leading to the tank. Use a standard bicycle pump with a low-pressure gauge to check the Schrader valve on the tank base. It should read exactly between 5 and 7 psi when completely empty of water.
3. The Pinched O-Ring Leak
- Symptom: A slow, persistent drip emerges from the seam of a newly replaced pre-filter housing, regardless of how hard you tighten it with a wrench.
- Fix: Stop tightening immediately. You are distorting the plastic housing. Shut off the water supply, depressurize the line, remove the sump, and inspect the rubber O-ring. It is likely pinched or stretched out of shape. Replace the O-ring, apply food-grade silicone lubricant, and re-thread the housing hand-tight before applying a final quarter-turn with the wrench.
4. Brine Tank Mushing
- Symptom: The tank continues to use salt, but the household water remains moderately hard. When you dig into the brine tank, the bottom is filled with a thick, muddy sludge instead of cleanly dissolved crystals.
- Fix: You are using low-quality rock salt that contains heavy dirt and insoluble impurities. The resulting sludge is actively blocking the brine pick-up tube. You must manually scoop out the mush, wash the tank completely clean with a hose, and switch to high-purity evaporated salt pellets.
FAQ
How often should I change my reverse osmosis pre-filters? Carbon blocks and sediment cartridges should be replaced every 6 to 12 months. If your municipal supply has high chlorine levels, pushing past 12 months allows the chemical to breach the carbon barrier, which will permanently destroy the sensitive thin-film composite membrane.
Why is my system running out of salt so quickly? Your control valve settings may be mismatched to your actual municipal water hardness, causing the unit to regenerate far too frequently. Booking a Free In-Home Water Testing Edmonton assessment can help you recalibrate the grains-per-gallon setting on the digital interface, stopping the system from wasting excessive salt and water down the drain.
Can I use any type of salt in my brine tank? No. Avoid standard rock salt, which contains up to 2% insoluble dirt that creates sludge in the bottom of the tank. Always use high-purity evaporated salt pellets (rated at 99.8% pure) to prevent injector clogging and ensure the safety float assembly moves freely.
What happens if I forget to lubricate the filter housing O-ring? A dry rubber O-ring will buckle under rotational friction when you tighten the housing. This creates a tiny gap that will cause a pressurized leak. Furthermore, a dry rubber seal will fuse to the plastic threads over time, making it nearly impossible to remove the housing during your next scheduled maintenance.