Water Filter Installation: A Step-by-Step Guide for Under-Sink and Countertop Systems
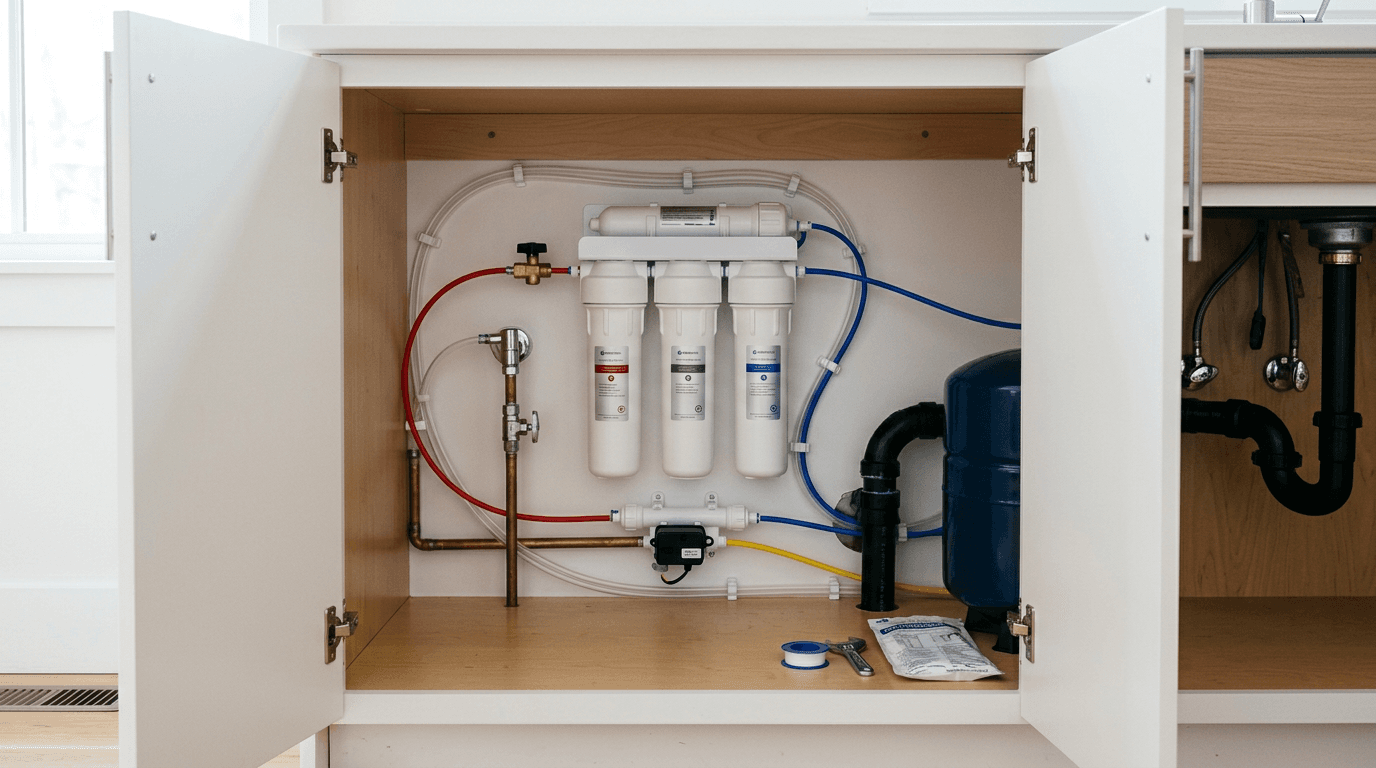
The true test of a water filter installation arrives about twenty minutes after the tools are packed away, when a microscopic drop of water forms at the base of a quick-connect fitting and silently falls onto the cabinet floor. This is a plumbing task that looks simple on a schematic but demands absolute precision in practice. Most residential water damage originates not from burst mains, but from improperly seated supply lines and cross-threaded adapters installed under residential sinks.
Quick Summary
Water filter installation requires manipulating your home's active water supply, demanding careful component alignment and thorough leak testing. This guide covers the mechanics of countertop integration, under-sink inline setups, and complex reverse osmosis assemblies. Success depends on verifying valve integrity before cutting lines, executing perfectly square tubing cuts, and testing for micro-leaks under operating pressure.
- Test existing shut-off valves for complete seal before beginning any disassembly.
- Countertop systems require precise thread matching at the faucet aerator to prevent stripping.
- Under-sink quick-connect fittings fail if tubing is cut at an angle or not pushed past the internal O-ring.
- Reverse osmosis drain saddles must be mounted on vertical plumbing above the P-trap to prevent sewer gas backup.
Table of Contents
- 1. Assessing the Sink Infrastructure
- 2. Countertop System Integration
- 3. Under-Sink Inline Filtration
- 4. Reverse Osmosis Configurations
- 5. System Priming and Leak Verification
- Common Pitfalls & Troubleshooting
- FAQ
- Recommended Reads
1. Assessing the Sink Infrastructure
Why Aging Angle Stops Dictate Your Approach
Before you purchase components or clear the cabinet space, the existing plumbing infrastructure dictates whether an installation will take an hour or require an emergency plumber. The most critical point of failure in any under sink water filter system installation is the cold water shut-off valve, commonly known as an angle stop.
In older properties, traditional multi-turn gate valves often calcify. When you attempt to shut off the water to install a feed adapter, the rubber washer inside the valve tears, or the calcified stem refuses to seat fully. The symptom is a kitchen faucet that continues to drip even when the valve is tightly closed. If you disconnect the supply line while the valve is bypassing, you will flood the cabinet. Always test the valve by closing it completely, opening the cold water tap, and waiting five minutes to ensure the flow stops entirely. If it drips, the angle stop must be replaced by shutting off the main house water supply before the filter project can proceed.
Additionally, note the fitting sizes. Most modern kitchen faucets use a 3/8-inch compression fitting at the shut-off valve, but older homes might feature 1/2-inch threaded connections. Your filter's feed water adapter (the T-valve) must match this specification exactly. Attempting to force mismatched threads using excessive thread seal tape is a guaranteed route to a severe leak.
2. Countertop System Integration
Thread Pitch Mechanics and Diverter Failures
A countertop water filter diy project is generally the least invasive approach, favored by renters or those avoiding cabinet modifications. These systems bypass under-sink plumbing entirely, routing water through a diverter valve that replaces the existing faucet aerator.
The mechanism relies on replacing the standard aerator with a specialized diverter that features a side port for the filter tubing. When the diverter pin is pulled, water is forced through the side port, into the filter housing, and out through a dedicated spout. The primary failure mode here involves thread pitch mismatch. Faucets typically feature either female threads (where the aerator screws into the spout) or male threads (where the aerator screws over the outside).
Manufacturers supply a standard diverter and a handful of plastic or brass adapters. The mistake users make is cross-threading these fine-pitch adapters. Because the diverter must withstand line pressure - which can range from 40 to 60 psi - a cross-threaded connection will spray violently across the kitchen the moment the tap is opened. Always thread the adapter entirely by hand. If you feel resistance before the adapter is flush with the spout, stop, reverse it, and check the thread alignment. Only apply a wrench, wrapped in a cloth to protect the finish, for the final quarter-turn to compress the rubber gasket.
3. Under-Sink Inline Filtration
The Critical Path of Quick-Connect Fittings
Permanent under-sink systems provide higher flow rates and better aesthetics by removing the hardware from the counter. The installation hinges on inserting a feed water adapter between the cold water shut-off valve and the braided faucet supply line. This adapter diverts a small portion of the flow to the filter housing.
Once the adapter is secured, water travels through 1/4-inch or 3/8-inch semi-rigid plastic tubing. These systems almost universally rely on quick-connect (often branded as John Guest) fittings. These fittings do not use threads or clamps; they secure the tubing using a stainless steel grab ring (the collet) and seal the water using an internal rubber O-ring.
The mechanics are simple but unforgiving. The tubing must pass through the collet and fully seat inside the O-ring. If the tubing is cut at an angle, the sharp point will push past the O-ring, but the shorter side will leave a gap, resulting in a continuous drip under pressure.
Practical rule: Always measure and cut plastic tubing squarely with a sharp utility knife or dedicated tube cutter; never use scissors or wire cutters, as they crush the tube out of round, permanently compromising its ability to seal against the O-ring.
For regional hard water mitigation, reviewing the Edmonton Water Hardness & Quality Guide | Water Triton specifications clarifies why a basic carbon inline filter might struggle with excessive scale, requiring more frequent replacements if not paired with a pre-treatment system.
4. Reverse Osmosis Configurations

Managing Wastewater and Drain Saddle Alignment
The installation of water filter system hardware reaches its peak complexity with reverse osmosis (RO). Unlike standard inline filters that simply trap contaminants, RO membranes separate water molecules from dissolved solids, producing purified water and a concentrated brine stream that must be rejected down the sink drain.
This requires installing a drain saddle - a plastic clamp that wraps around the existing sink drainpipe, providing a port for the waste line. The mechanic involves drilling a 1/4-inch hole into the drainpipe. The most common critical error is installing the drain saddle on the horizontal run of the pipe, or anywhere downstream of the P-trap. If placed below the P-trap, sewer gases will travel freely up the RO waste line, migrating past the air gap and into the kitchen environment. The saddle must be mounted on the vertical tailpiece, above the water seal of the P-trap.
Additionally, RO systems rely on a pressurized storage tank because the membrane produces water too slowly for on-demand dispensing. The tank utilizes an internal butyl bladder pre-charged with air. Before connecting the tank, verify the empty air pressure reads between 5 and 7 psi using a digital tire gauge. If the pressure is too low, the tank will fill but lack the force to push water up to the dispensing faucet.
When treating challenging municipal feeds, combined solutions are often necessary. We serve Edmonton, Beaumont, Leduc, and Sherwood Park where locally relevant water profiles demand rigorous treatment. Reference our Triton Pure and Triton Pure Tankless packages when discussing combined softener and RO solutions, as pre-softening the water prevents the RO membrane from rapidly calcifying and failing prematurely. For detailed regional standards, consulting Reverse Osmosis System Installation Edmonton | Water Triton outlines the specific drainage and pressure requirements for proper setup.
5. System Priming and Leak Verification
Detecting Micro-Leaks Before Cabinet Damage
A newly installed diy water filter system is never immediately ready for consumption. Fresh carbon blocks are coated in fine carbon dust from manufacturing, and RO membranes are often shipped with a liquid preservative that must be flushed.
Priming the system involves opening the feed valve slowly to prevent a sudden water hammer from rupturing the housings. For inline systems, run the water continuously for 10 to 15 minutes until the water runs completely clear. For RO systems, you must allow the storage tank to fill entirely - which can take up to three hours - and then drain it completely by locking the dispenser faucet open. Do not consume this first tank of water.
During this initial fill period, the system must be meticulously checked for micro-leaks. A visual inspection is insufficient. The proper mechanic is to place dry blue shop towels (which show water stains distinctly) directly under every connection point, including the feed adapter, the drain saddle, and every quick-connect fitting on the housing. Leave them in place for 24 hours. A fitting that seems dry after five minutes may still weep one drop per hour - enough to eventually warp the medium-density fibreboard (MDF) base of a kitchen cabinet.
Common Pitfalls & Troubleshooting
Even with meticulous execution, physical variables in plumbing can lead to immediate operational issues. These are the most frequent post-installation failures and their specific diagnostics.
The Continuous Drain Gurgle (RO Systems) Symptom: A hissing or gurgling noise from the sink drain that never stops, even overnight. Diagnosis & Fix: This is the most common real-world RO issue. It means the system is continuously sending water to the drain and never achieving shut-off pressure. The primary cause is low incoming water pressure (below 40 psi) or a ruptured bladder in the storage tank. If the house pressure is adequate, use a bicycle pump to re-pressurize the empty storage tank to 7 psi. If the tank refuses to hold air, the internal bladder is torn and the tank must be replaced.
Cloudy or Milky Dispensed Water Symptom: Water drawn from the new dedicated faucet looks opaque and white, but clears from the bottom of the glass upwards after a minute. Diagnosis & Fix: This is not a chemical contaminant; it is trapped air in the new filter housings being forced through the water under pressure, creating micro-bubbles. It is entirely harmless. The fix is simply time and usage. The air will naturally bleed out of the system after a few days of normal operation.
The Weeping Quick-Connect Fitting Symptom: Water slowly pools directly beneath a tubing connection, despite the tube feeling secure. Diagnosis & Fix: The tubing was either scored during insertion, cut at a slight angle, or not pushed past the internal O-ring. Turn off the feed water, relieve system pressure by opening the faucet, depress the collet ring against the fitting body, and pull the tubing out. Cut exactly one half-inch off the end of the tubing to create a fresh, perfectly square edge, and reinsert it firmly until you feel it hit the back stop.
Low Flow at the Dispenser Faucet Symptom: After a week of normal operation, the dedicated faucet suddenly only provides a weak trickle. Diagnosis & Fix: The supply line linking the storage tank to the faucet has likely kinked. Semi-rigid tubing becomes pliable when exposed to hot water lines under the sink, causing tight bends to collapse inwards. Inspect the entire run of tubing and reroute it using gentle, sweeping curves rather than sharp 90-degree angles.
FAQ
Do I need thread seal tape on the plastic quick-connect fittings? No. Applying thread seal tape (Teflon tape) to quick-connect fittings or any fitting that relies on a rubber washer or O-ring will actually cause leaks. The tape prevents the threads from closing tightly enough to compress the rubber seal properly. Tape is only used on tapered metal pipe threads (NPT).
How long does a standard installation take? A simple countertop diverter takes roughly ten minutes. An under-sink inline filter typically takes an hour. A full reverse osmosis installation, accounting for drilling the drain pipe and mounting the tank, usually requires two to three hours of dedicated work.
Can I install an under-sink system if I have a pull-down kitchen faucet? Yes. The feed water adapter connects at the cold water angle stop valve near the floor of the cabinet, long before the water reaches the faucet hoses above. The type of primary kitchen faucet you have does not impact the installation of a separate, dedicated drinking water line.
Why does my new filter make a loud vibrating noise when I turn it on? A loud humming or vibrating noise immediately after installation is caused by air pockets trapped inside the filter housing vibrating against the water flow. Flush the system continuously for ten minutes, occasionally turning the faucet on and off rapidly to dislodge the trapped air.
Does an RO system require an electrical outlet? Standard residential RO systems operate purely on line water pressure and do not require electricity. You only need a dedicated electrical outlet under the sink if you are installing a specialized system that includes an electric booster pump (for homes with well water pressure below 40 psi) or a system equipped with an ultraviolet (UV) sterilization lamp.